Starting your VPS brings your virtual machine back online, allowing websites, emails, and applications to run as normal. Whether you're recovering from maintenance, rebooting after a shutdown, or launching a new deployment, here's how to do it safely.
Reasons to Start a VPS
- Resuming Services: Reactivate your websites, emails, databases, and applications after maintenance or downtime.
- Post-Shutdown or Reboot: After a scheduled shutdown or reboot, you’ll need to manually start your VPS to bring it back online.
- Deployment or Testing: Start the server to test new software, deploy a new website, or continue development work.
- Emergency Response: Quickly bring services back online after resolving an outage or configuration issue.
- Scaling Up: Start additional VPS servers as part of load balancing or scaling your infrastructure.
Steps to Start Your VPS Server
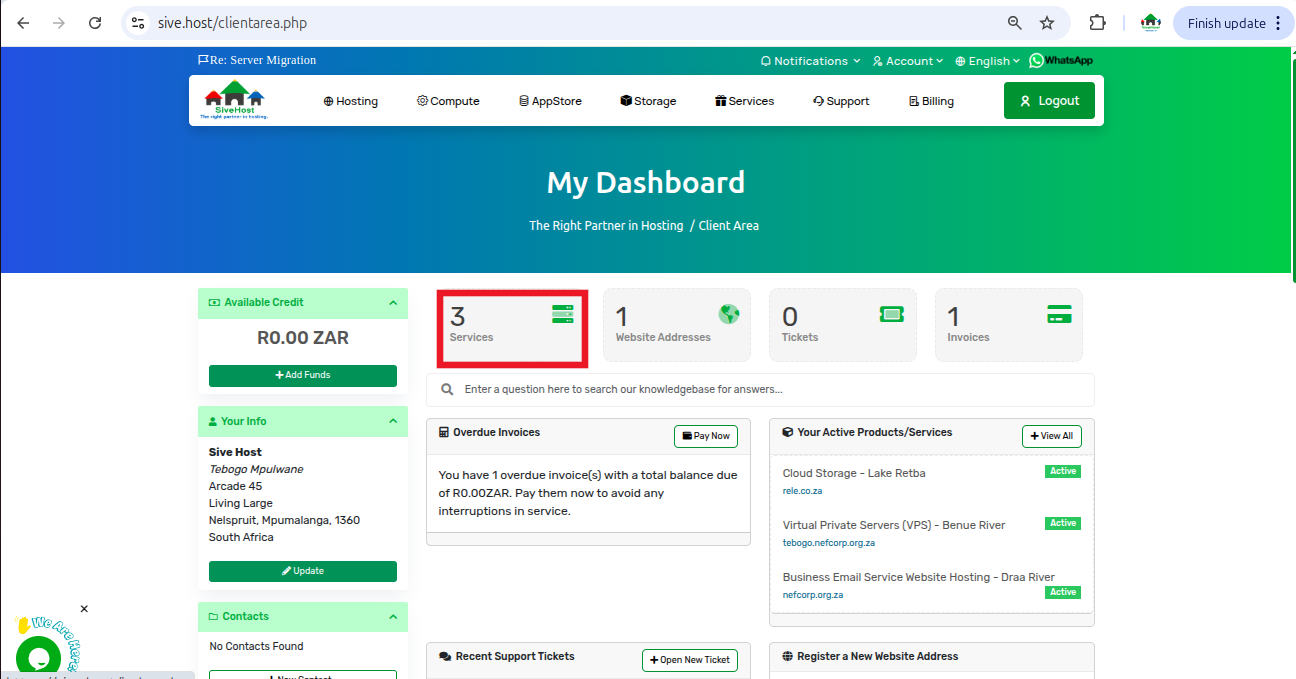
Log in to your Sive.Host Client Area
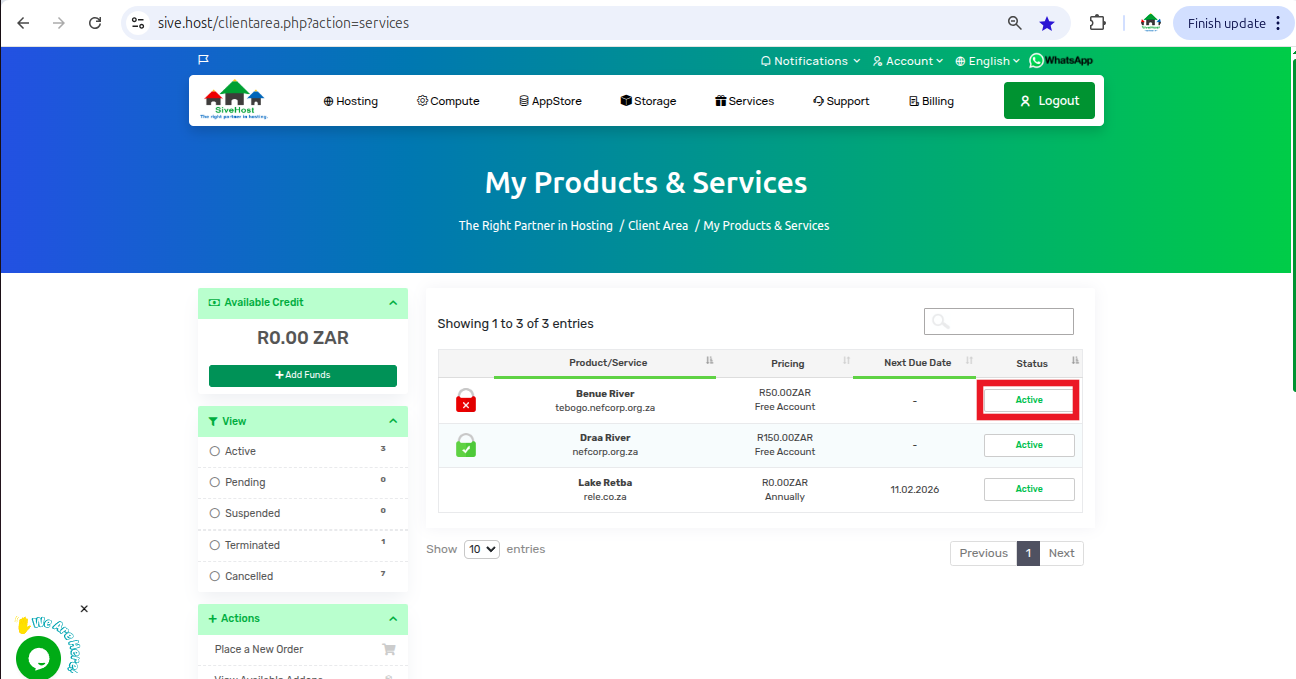
Click on “Services” to view all your active VPS products
Find the VPS you want to start and click “Active.”
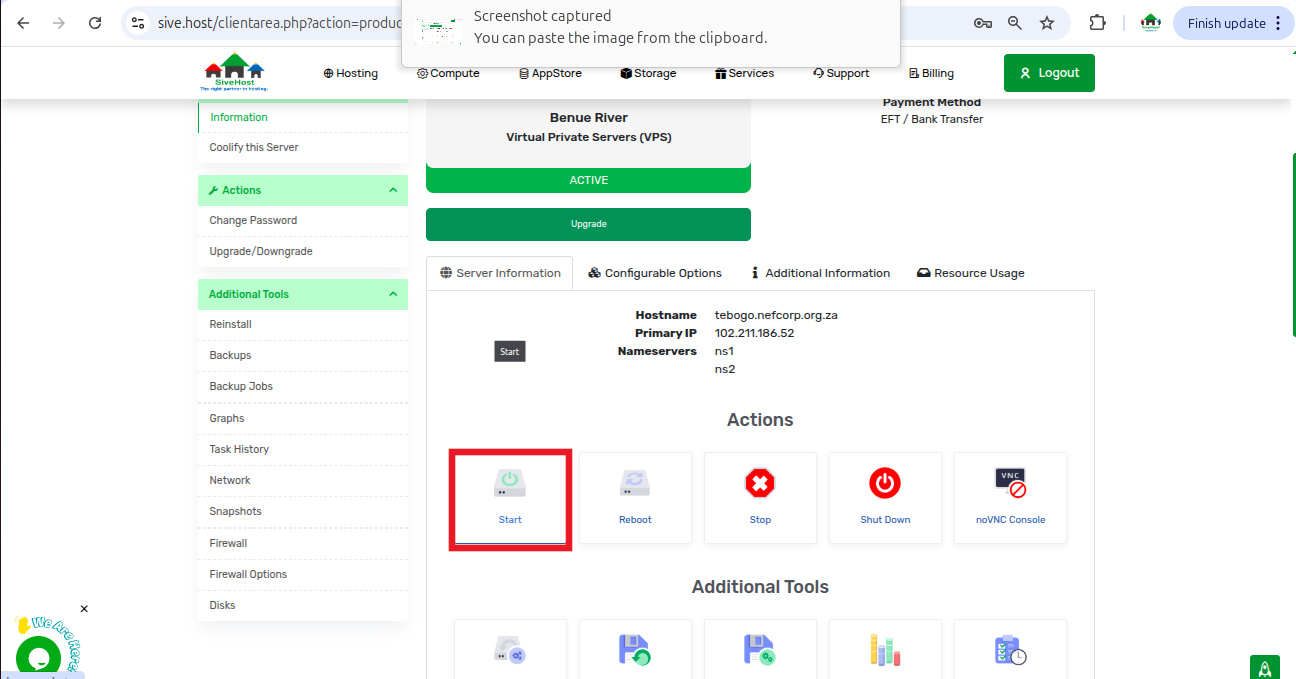
On the VPS Product Page, click “Start” under Actions
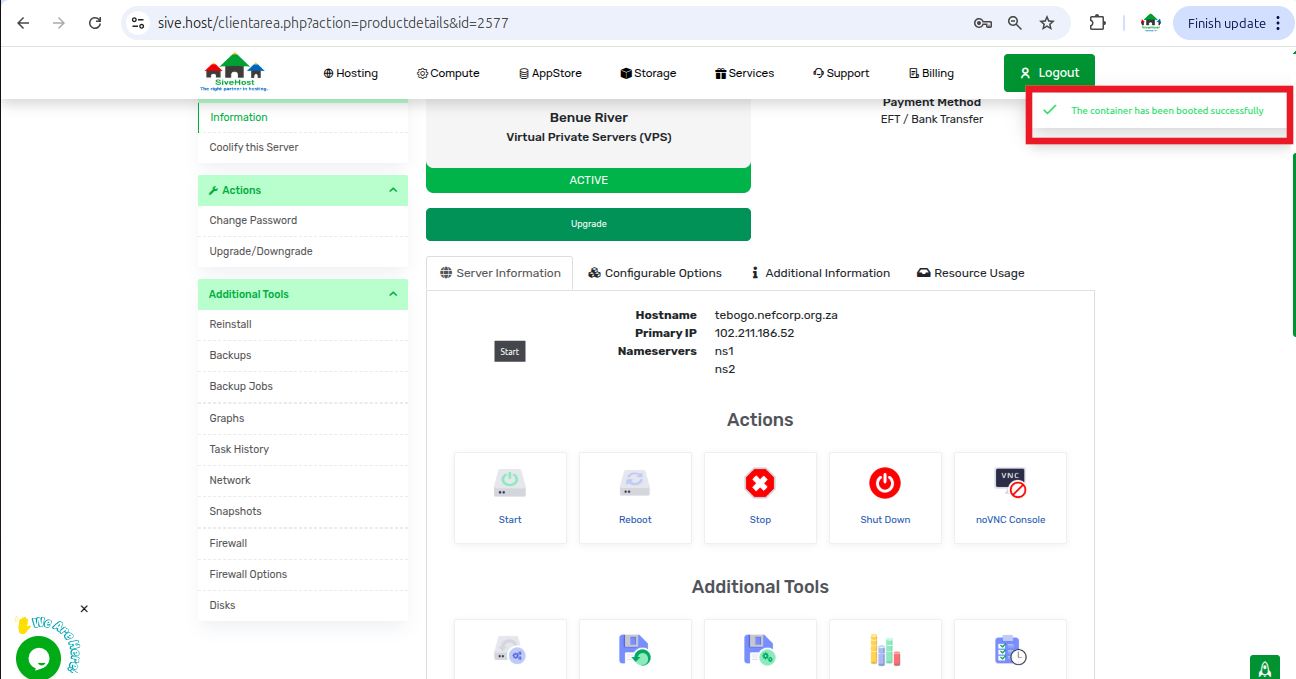
Click “confirm” to initiate the start-up of your VPS

Then you will see a pop-up on the top right corner to confirm successful Start.
Important Considerations
Starting a VPS may take 2–5 minutes, depending on your OS and installed services.
Make sure the VPS isn’t already running to avoid unnecessary actions.
After startup, double-check that critical services (web server, database, email) are functioning properly.
If you’ve recently changed system settings, monitor for any errors on boot.
Tip: If your server doesn’t start as expected, try using the “Reboot” option, or contact Sive.Host support for assistance with recovery or logs.
